
So, congratulations on your iPhone purchase! You’re about to have an exciting journey with your new device – by the way, our blog will greatly help with that. But first things first, you need to register an Apple ID account. Here’s how you can do it.
Why do you need an Apple ID?
An Apple ID is a unique identifier in the Apple ecosystem. Without it, you won’t be able to utilize your device fully. That’s why during the setup of your new device, you’ll be prompted to enter your Apple ID and password.
With your Apple ID, you can:
- Sync all Apple devices (we’re sure you won’t limit yourself to just buying an iPhone) and access all personal data from any device: contacts, notes, documents, photos, and videos can be viewed through iCloud storage;
- Download paid and free content from the App Store: apps, games, music, etc;
- Make free audio and video calls via FaceTime;
- Send and receive free multimedia messages on iMessage (texts and pictures).
How to create a new Apple ID on an iPhone or iPad?
During device activation:
- Select the Forgot password or don’t have an Apple ID? option;
- Click Create Apple ID for free;
- Enter your birthdate and name. Click Next;
- Use your existing email address or create a new one;
- Follow on-screen prompts: verify your email address, create a secure password, choose a region, and set up two-factor authentication. If you skip this step, you can still do it later in “Settings.”
If your device is already activated:
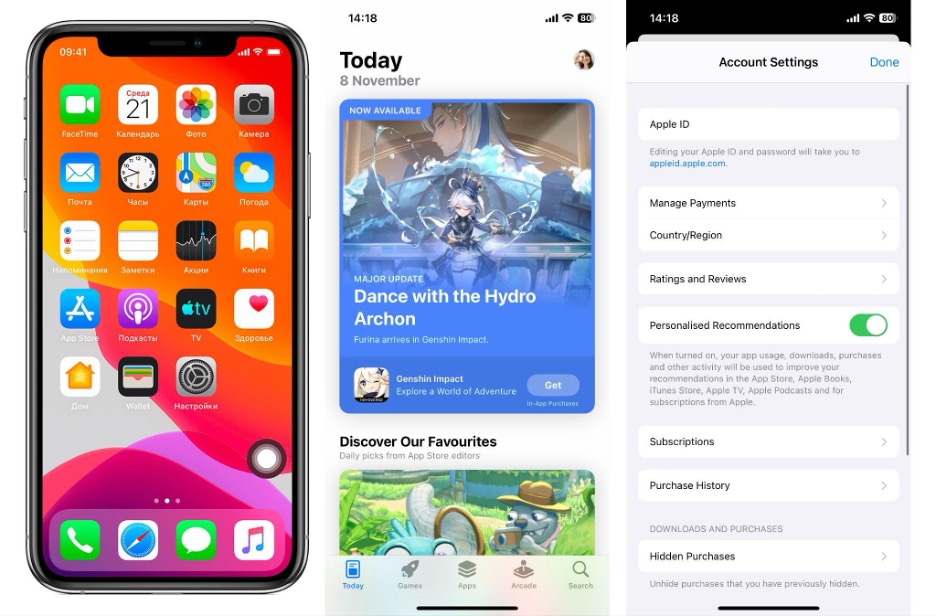
- Open the App Store and click My Account;
- Click “Create a new Apple ID.” If this option is not displayed, check if you’ve signed out of iCloud;
- Enter the email address that will be your new Apple ID;
- Create a password and specify your device’s region;
- Choose a payment method for Apple’s paid content and click “Next.” But you can also choose “None” as an option;
- Confirm your phone number to help verify your identity and recover your account if needed. Click Next;
- Check your email. You’ll receive a confirmation email from Apple to verify your email address.
How to create an Apple ID on a MacBook?
- Select the Apple menu. Click the apple icon on the toolbar at the top of the page;
- Go to “System Preferences”;
- In the side menu, click “Sign in with Apple ID”;
- On the opened page, at the bottom, click “Create Apple ID”;
- Follow the on-screen prompts, as detailed above.

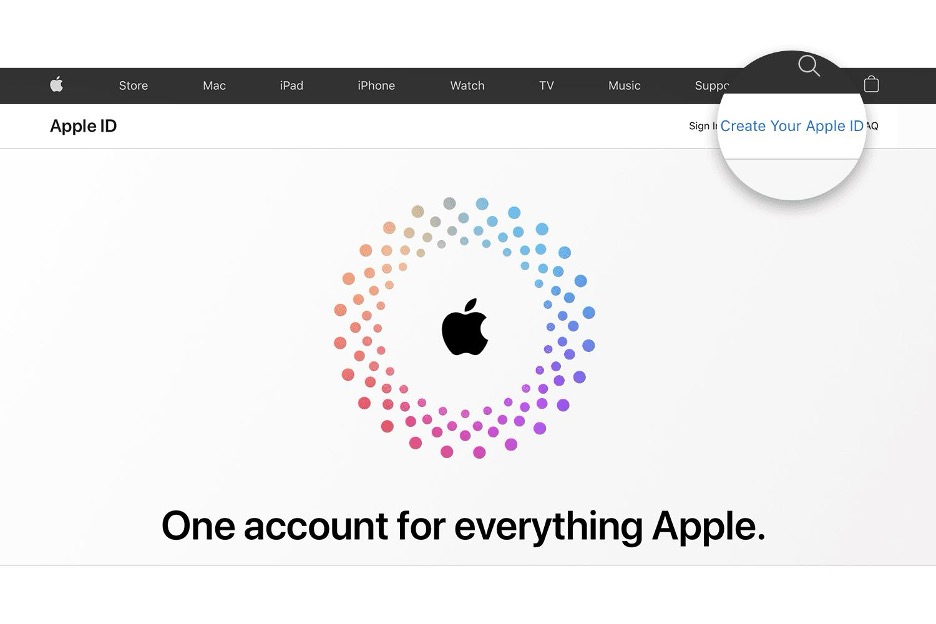
How to create an Apple ID through a browser?
- Go to the website applid.apple.com;
- Choose “Create Your Apple ID”;
- Follow on-screen prompts: enter your email address, set a password, and choose your region. This email address will be your login for the account;
- Enter a phone number you have constant access to;
- Check the boxes if you want to subscribe to Apple updates and stay informed about the latest company news;
- Click “Continue”;
- Complete the account creation process by confirming your email address and contact number.
Sometimes, new users face difficulties in registering a new account. iSpace specialists will be happy to help you understand all the nuances of setting up and using your device. Additionally, you can purchase a comprehensive training course on working with your new device. Gift certificates are also available.
Always be aware!
Subscribe to the newsletter and be the first to know about new promotions and special offers