
After the start of sales of new iPhones, many users update their devices. Transferring data from one iPhone to another immediately becomes relevant. If you are doing this for the first time, our instructions will come in handy. We know 3 ways to do this: choose the one that seems to you the most simple and convenient.
Step 1: Save all data and settings
Any of the methods we have proposed begins with preparation. Namely, from data backup, which can be restored in case of replacement, loss, or damage to the device. In all cases, the creation of this copy will be the same, the differences will be only in the process of transfer. So, let’s get started.
- Connect iPhone to a Wi-Fi network.
- Go to the “Settings” of the device, click on your name, and select the iCloud section.
- iCloud Backup “.
- Click “Back Up” and stay connected to your Wi-Fi network until the process is complete.
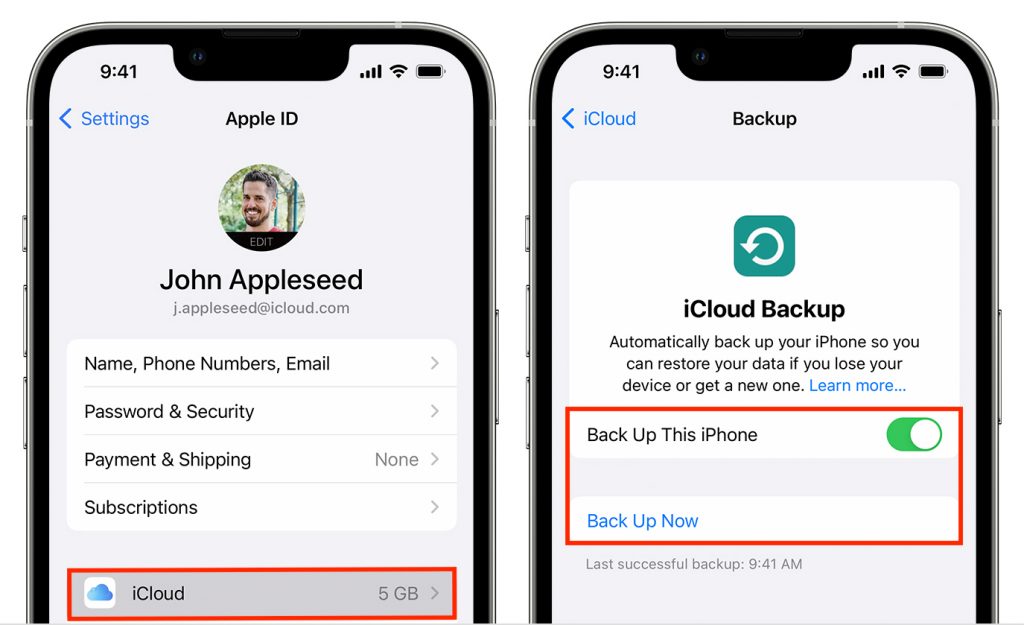
Please note that if the function is activated, then a copy is automatically created when the device is connected to a power source, locked, and in a Wi-Fi network. Below the Create Backup command, the date and time the last backup was created is displayed. If you see a warning that there is not enough space in iCloud storage to complete the backup, then you need to change your plan and pay for more storage. Otherwise, you will not copy all the data from your device.
iCloud backup includes data and settings stored on your device. A few clicks – and you will transfer all your contacts, photos and videos, notes, and messages from one device to another.
iCloud Backup
After creating a backup, you need to log out of your account on the old device and go to your Apple ID on the new one. Thus, you will transfer all your personal data. Follow the instructions below.
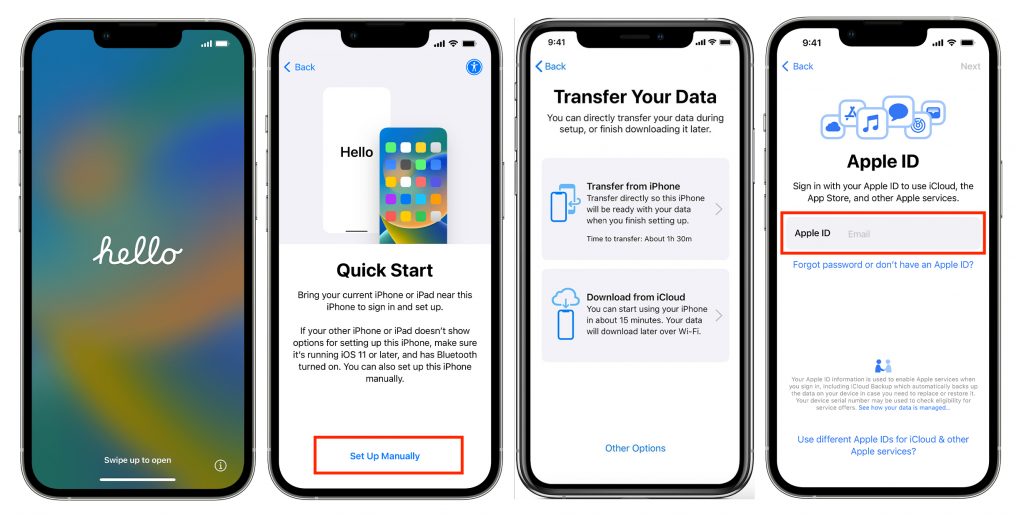
- Turn on the new device. The welcome screen will appear.
- Connect your iPhone to a power source.
- Click on the Wi-Fi network name to connect to it.
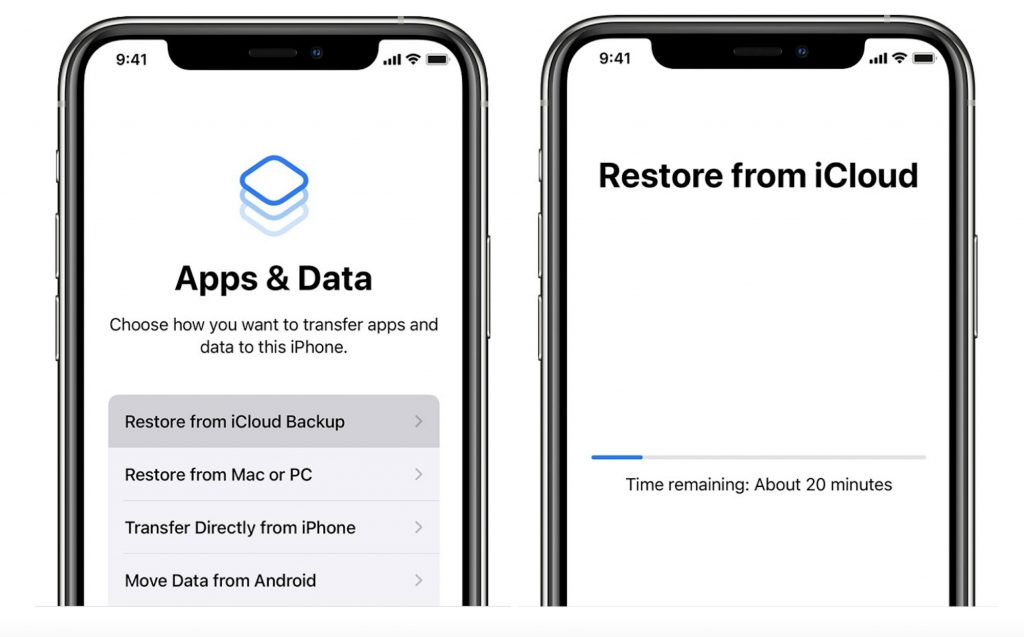
- On the Apps & Data screen, tap the Set iPhone as a new button to switch it to Restore from iCloud Backup.
- Sign in to iCloud using your Apple ID.
- Next, select the backup you want to restore. Check the creation date and size.
- Do not disconnect from the Wi-Fi network and from the power source until the process is completed.
Method 2: Use the Quick Start feature
This feature appeared in iOS 11 and greatly simplified the transition from one smartphone to another. The only condition: be prepared to use both devices at the same time.
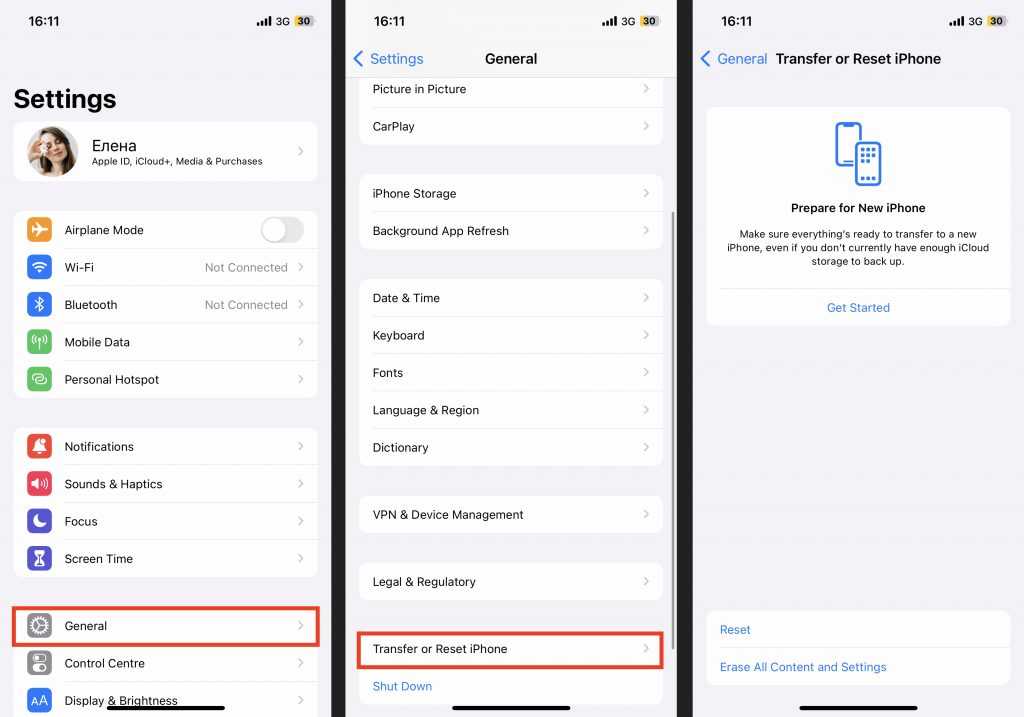
So, if the device you bought is already activated, then you need to clean it before downloading the backup. To do this, follow the path: “Settings” – “General” – ” Transfer or reset iPhone “And activate the transfer preparation wizard.
- Turn on your new iPhone. To do this, press and hold the side button until the Apple logo appears.
- Next, select the language and region, activate Bluetooth, connect to the Wi-Fi or hotspot of the old iPhone (Tethered Mode), and set up Face ID or Touch ID.
- After completing the initial setup, you will see on the screen the name of the function – “Quick Start”. Click the link button at the bottom of the Configure Manually page.
- Now make sure your old iPhone is connected to the same Wi-Fi network and Bluetooth is enabled on it.
- Bring your old iPhone to your new one. A blue animation will appear on the screen of the new device, and a round frame with a camera will appear on the screen of the old one. point the camera at the animation. Important: if it fails, go back a few steps and try again.
- A choice of data transfer method will appear on the screen: Download from iCloud And Transfer from iPhone. The difference is that in the first case, the data will be transferred in the background and you will be able to use a new device in the process, and in the second, you need to wait for the process to complete on both devices.
In this case, both devices must remain nearby and connected to power. It is difficult to say how long it will take to transfer data from iPhone to iPhone: the network bandwidth and the amount of data transferred are different for all users.
Method Three: Transfer Data Using Finder
This tool is worth using if your iPhone backup is too large and there is simply not enough space in iCloud storage. First, you need to create a copy of the existing information.
- Connect your iPhone to your MacBook using a USB – C cable.
- Grant access by confirming on your phone that your Mac can be trusted. If the device is locked, enter the password.
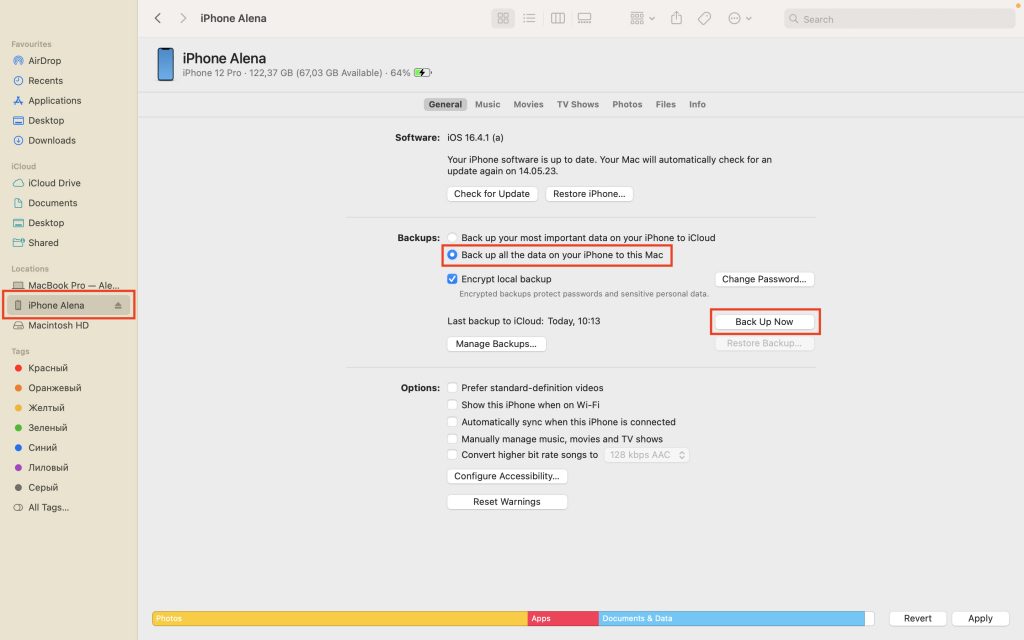
- Open Finder on Mac. In the side menu on the left in the list of devices, find the iPhone and click on it.
- at the top of the Finder window. Go to “Basic”.
- Next, select the “Back up all data from iPhone to this Mac option. You can also “Encrypt local copy” by setting a password.
- Click on the “Back Up Now” button on your MacBook.
You can make yourself some tea and read a book since copying can take several hours – it all depends on the number and weight of files on the iPhone. By the way, your MacBook must be running macOS 10.15 or later.
Now that the copy has been created, you can transfer data to a new iPhone.
- Turn on your brand-new iPhone. You will see a welcome screen. If the device is already set up, wipe the data on it. How to do this, we told above.
- Then just follow the prompts on the screen. When the Apps & Data screen appears, select Restore from Mac or PC c windows “.
- Connect your new iPhone to the computer that has the backup. Use a USB Type C cable.
- Open the Finder app on your MacBook and select iPhone from the sidebar. Confirm that you trust this device if the system asks.
- Select “Restore from a copy”. Select an up-to-date backup by checking its creation date and size.
- If necessary, restore data from an encrypted backup. In this case, the system will ask you to enter a password.
- It remains to wait until the end of the recovery process and complete the setup of the new iPhone. It recommends that you unplug your device from power and Wi-Fi. This will automatically upload photos, videos, music, documents and other files to it from iCloud storage.
Always be aware!
Subscribe to the newsletter and be the first to know about new promotions and special offers